


ON THIS PAGE
The Planner
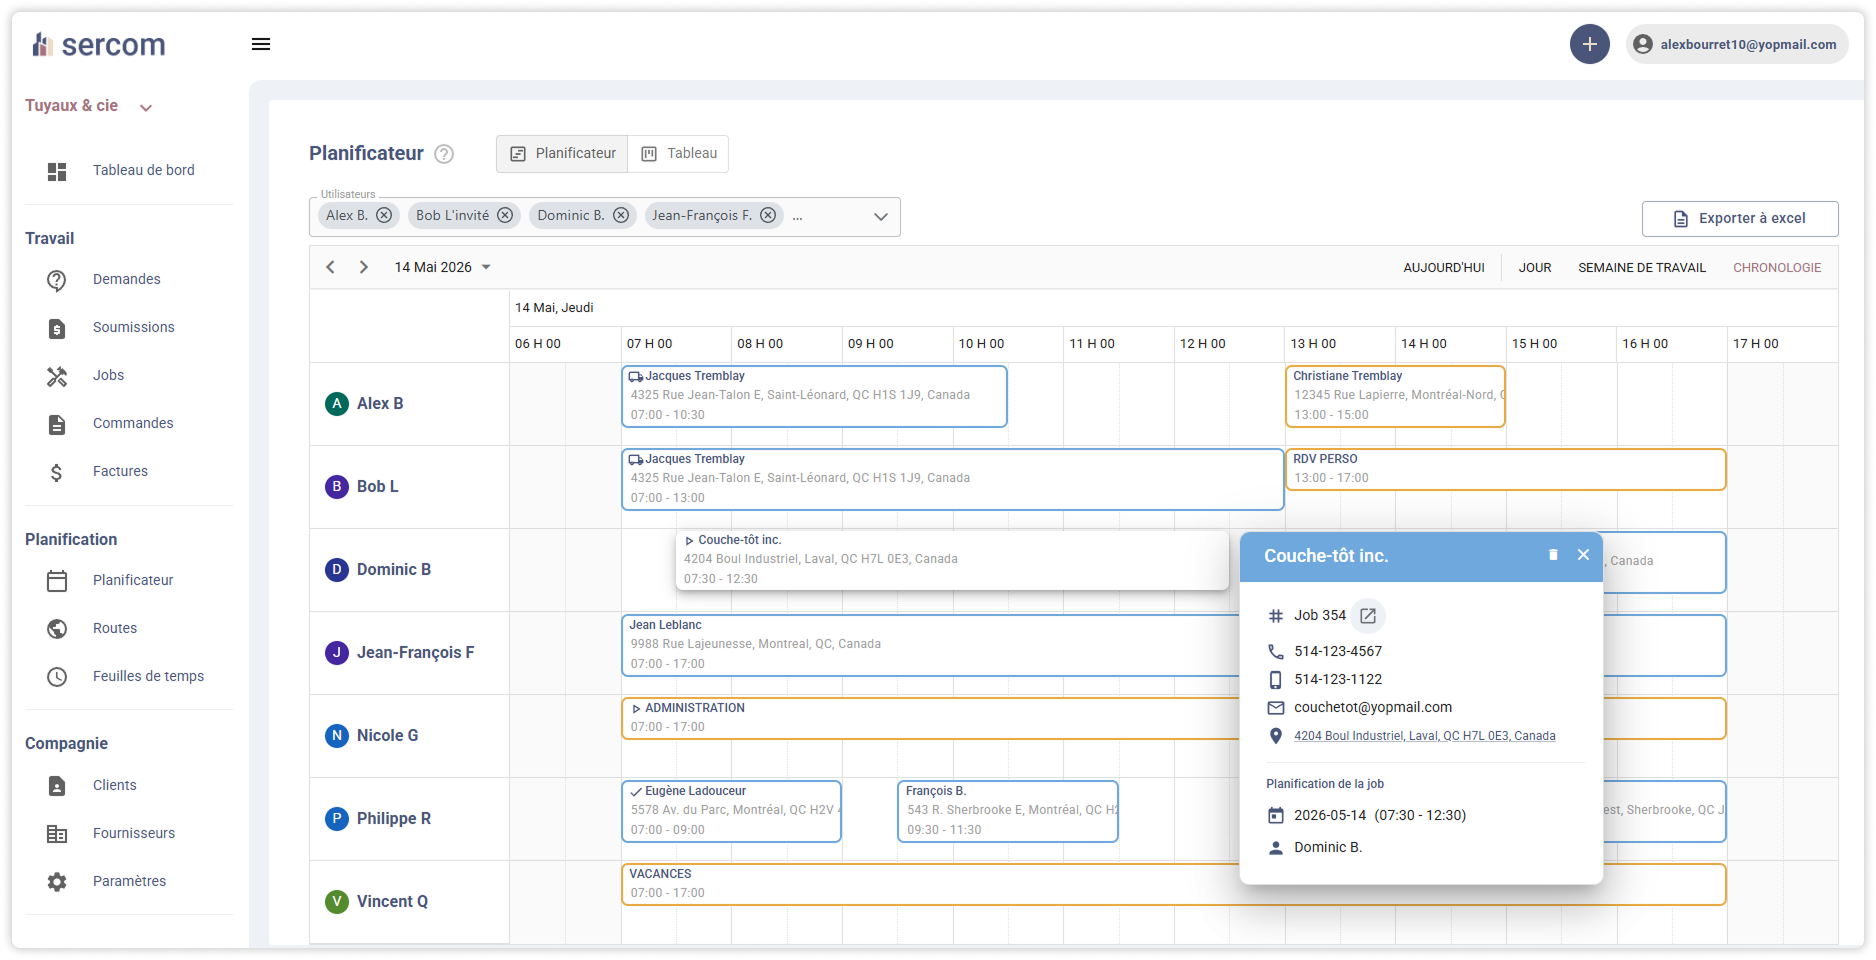
The heart of a dispatcher's day. View technician schedules, drag and drop to create a visit, and filter by user. This article covers views, navigation, filters, creation, and color coding.
What is the purpose of the visit planner?
The planner makes it easy to view the schedule of users (technicians, employees, etc.) with all the visits assigned to them.
The planner can be accessed via:
- The main menu on the left is "Planner".
- Submit a request by activating "Evaluation". Learn more about requests.
- Add visits via a job by displaying the scheduler. Learn more about jobs.
The different views available
The planner offers different view options. These can be accessed from the options in the top right corner:
- Week - Allows you to see the entire week selected for each user.
- Day - Allows you to view the entire selected day, vertically.
- Timeline - Allows you to view the entire selected day horizontally.
Navigate the planner
You can change the date/period at any time using the buttons in the top left corner of the planner.
📌 NORMAL BEHAVIOR
If you change the date to the future, the planner will remain at that date. If you change the date to the past, the planner will revert to today when the page is refreshed. At any time, you can click "Today" to return to the current day.
The calendar time range display depends on your company settings. Learn more about company settings
Filter the planner
At any time, you can filter the calendar by selected users in the top left corner of the Planner. This makes it easy to view the schedules of specific users.
📌 NORMAL BEHAVIOR
User filters are saved and will remain even if you refresh the page.
Create a job or request (via the scheduler)
From the Planner, you can click or "Drag" to add a job or request according to the selected time slot.
Create or add a visit (via jobs/requests)
When you are in a specific request or job, an additional option is available: Add a visit.
This feature is very useful for:
- Assign multiple users to the same job/request at the same time, for the same schedule.
- Assign the entire day instead of dragging on the calendar.
- Assign several days at a time.
After using it for a while, you will notice that different colors and icons appear on the visits:
- Blue: Indicates that the visit is for a job
- Orange: Indicates that the visit is for a request (evaluation).
- Grey: Indicates that the visit is in the past (planner) or that it is for a different job/request (when in a specific job/request).
- The statuses "On the way", "In progress" and "Completed" are displayed to visualize progress.
- A billed job will have a dollar sign.
Meaning of colors and icons
Road access
A small hidden feature: Clicking to the right of a day (empty space) will open the specific route for the user and the selected date.